How to Remove SNS Nails at Home: Comprehensive DIY Guide
SNS nails are a mainstay due to their durability, ease of maintenance, and stunning appearance. However, when it comes time to remove them, many individuals need help with how to do so without causing damage to their natural nails. This article aims to provide a clear and confident guide on safely removing SNS nails at home.
Removing SNS nails at home can be done with the right tools and techniques, ensuring the natural nails remain healthy and strong. Following the recommended steps, such as using acetone and adequately preparing the nails for removal, is essential to prevent potential damage or infection.
By understanding the correct procedures, individuals can confidently remove their SNS nails at home, saving money and time whilst maintaining healthy and beautiful nails.
Understanding SNS Nails
The Appeal of SNS Over Acrylic or Shellac
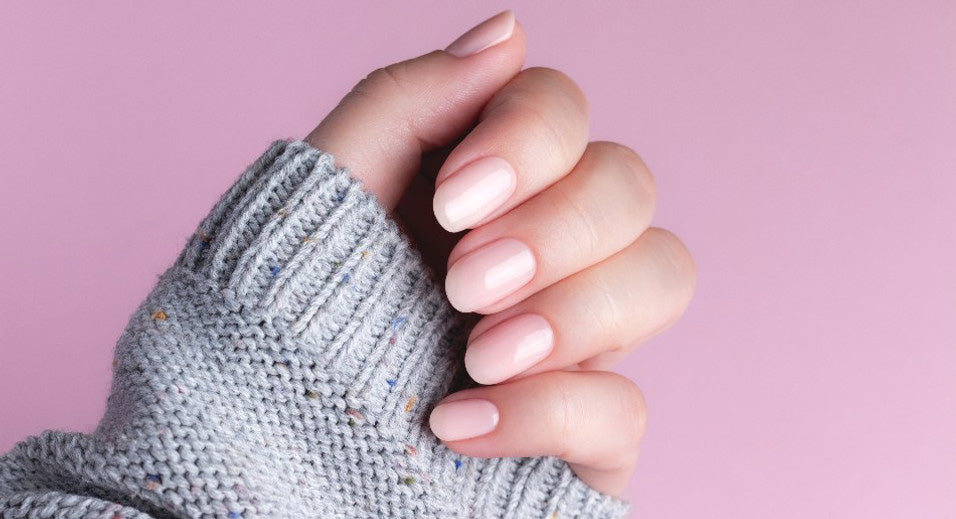
SNS, or Signature Nail System, initially became popular because it offered an alternative to traditional acrylic or shellac nail treatments. One reason for its appeal is that dip powder manicures are perceived to be less harmful to natural nails. While acrylic and shellac can weaken the nail plate and cause brittleness, SNS provides a more lightweight and flexible coating. The SNS powder is made from organically processed chemicals.
It contains vitamins and calcium, which may help to strengthen the nails.
Another attractive feature of SNS nails is their durability. The dip powder process gives a long-lasting finish, typically lasting 2-3 weeks without chipping or peeling. As well as being more resistant to everyday wear and tear, SNS nails offer various colours and designs, allowing for versatile and creative looks.
How SNS Nails Adhere to the Natural Nail
Applying SNS nails involves dipping the natural nail into a coloured powder, which adheres to a specially formulated resin base coat. This unique bonding method avoids the need for harsh chemicals, UV or LED lights, and the pungent odours often associated with other nail systems.
The layers of powder and resin create a protective coating on the nail plate without causing damage to the natural nail. This means that SNS nails can promote healthier nails when applied and removed correctly while still providing a polished, salon-quality finish.
SNS nails offer a more gentle approach to nail enhancements, focusing on durability and protecting the natural nail. The dip powder process creates a long-lasting finish without harsh chemicals, making them an appealing option for those seeking a healthier alternative to acrylic or shellac treatments.
Looking for the right tools to start your at-home SNS removal? Diamond Nail Supplies offers a comprehensive range of high-quality products to make the process smooth and efficient. Explore our collection now and equip yourself for the perfect DIY nail care experience!
Preparation for SNS Nail Removal
Before removing your SNS nails at home, you should be well-prepared. This section will help you gather the necessary tools and materials and understand how to prepare your nails for removal.
Gathering Necessary Tools and Materials
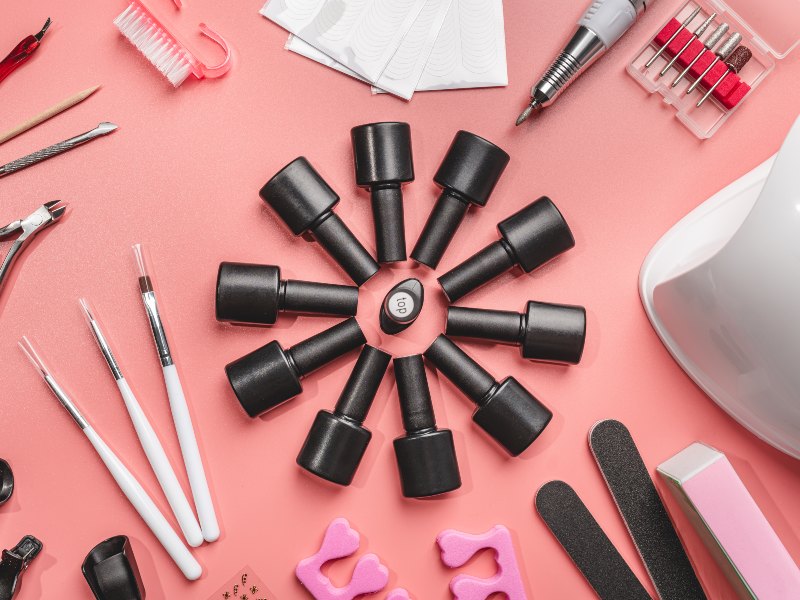
To ensure a safe and effective SNS nail removal process, gather the following tools and materials:
- 100% Acetone: Acetone is a powerful solvent that will help dissolve the SNS nails. Use 100% acetone, as other nail polish removers might not be strong enough.
- Nail file: You'll need a nail file to buff off the top layer of your SNS nails.
- Cotton wool: Soft cotton wool is required to soak the nails in acetone.
- Aluminium foil: This material helps wrap the nails and keeps them soaked in acetone for the time necessary.
- Towel: To protect your workspace and for easy cleanup.
- Warm water: Warm the acetone if needed, ensuring a faster removal process.
Steps to Prepare Your Nails for Removal
Follow these steps to prepare your nails for a safe and effective SNS nail removal:
- Buff the top layer of SNS nails: Before soaking the nails in acetone, gently use the nail file to remove the glossy top layer of your SNS nails. This will help the acetone penetrate the nail more effectively.
- Protect your workspace: Lay a towel on your workspace to avoid any spills or damage to the surface. This will also make the cleanup easier after the removal process.
- Warm up the acetone (optional): If needed, slightly warm up the acetone by placing a small container filled with acetone in a bowl of warm water for a few minutes. This step is optional but can help speed up the removal process.
With the tools and materials assembled and your nails adequately prepared, you can proceed with the SNS nail removal process. Remember to be patient and gentle, as rushing through the process could damage your natural nails.
Filing Down the SNS Nails
Technique for Reducing SNS Nail Thickness
To start removing SNS nails at home, you'll first need to file down your SNS nails. This helps reduce the thickness of the dip powder on your nails and makes the following steps more effective. Using a nail file with medium grit is ideal, as it is effective in removing the layers without causing damage to the natural nail plate.
Begin by gently filing the surface of each nail, paying close attention to the edges and corners. Maintaining a steady and even pressure while filing is crucial to avoid creating uneven patches on the SNS surface. As a rule of thumb, aim to remove around 70% to 80% of the dip powder layers, leaving a thin layer to protect the nail plate.
Remember to take occasional breaks while filing down your SNS nails to prevent over-filing and potential damage to your natural nails. It's essential to monitor your progress and adjust your filing techniques.
Here's a quick summary of the filing process:
- Choose a medium-grit nail file.
- Gently file the surface of each nail, focusing on the edges and corners.
- Maintain steady and even pressure throughout the filing process.
- Aim to remove 70% to 80% of dip powder layers.
- Take breaks to prevent over-filing and damage.
Following these guidelines and using a confident, knowledgeable, and neutral tone, you can effectively file down your SNS nails at home. This ensures a safe and efficient removal process, ultimately protecting the health and integrity of your natural nails.
The Soaking Method
The Soaking Method is a practical approach to safely and efficiently remove SNS nails at home. This section focuses on a primary soaking strategy: 'Using Acetone to Break Down SNS Bonds':
Using Acetone to Break Down SNS Bonds
Acetone is a powerful solvent capable of breaking down the bonds holding the SNS polish in place. To utilise the acetone-soaking method, follow these steps:
- Buff the nails: Gently buff the top coat off your SNS nails until the glossy surface turns matte. This process makes it easier to remove the remaining polish.
- Prepare the acetone: Pour enough acetone into a small bowl to soak the nails. Be cautious when handling the solvent, as it is flammable.
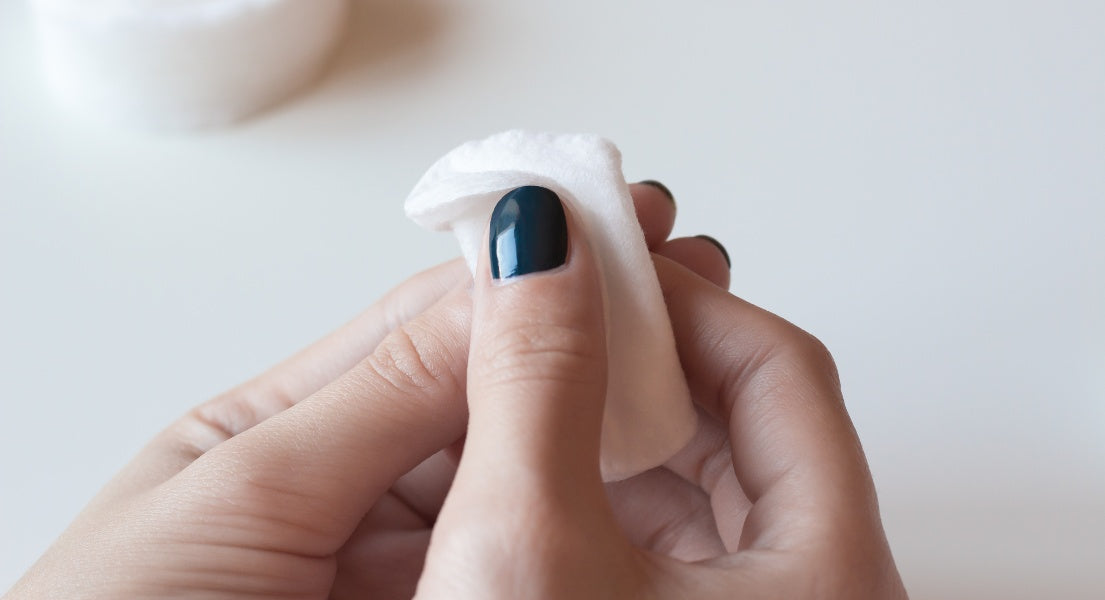
- Soak cotton wool in acetone: Saturate small pieces of cotton wool with acetone, ensuring complete coverage to remove the SNS polish.
- Wrap nails in foil: Place the acetone-soaked cotton wool on each nail and tightly wrap them with aluminium foil. This step ensures that the acetone remains in place and maximises its effectiveness.
- Allow time for soaking: Leave the nails wrapped in foil for approximately 10-15 minutes. This time allows the acetone to break down the SNS bonds effectively.
- Remove the foil and polish: Carefully unwrap the foil from each nail, gently remove any remaining polish with a soft tool, and rinse with warm water.
Discover the difference with Diamond Nail Supplies' range of SNS products. Whether you want to switch up your style or seek a healthier alternative to traditional nail treatments, our selection covers you. Dive into our vibrant range of colours and start your SNS journey today!
Applying Cuticle Oil and Moisturiser
After successfully removing your SNS nails at home, caring for the natural nail and surrounding skin is essential to promote optimal recovery and health. One crucial step is to apply cuticle oil and moisturiser to maintain nail and skin health post-removal.
Maintaining Nail and Skin Health Post-Removal
Acetone, commonly used during the SNS nail removal process, can dry the nails and surrounding skin. Therefore, replenishing the moisture loss is vital for the overall well-being of your nails and cuticles.
Cuticle oil is an excellent choice for restoring moisture to the nail bed and cuticle area. It's typically enriched with nourishing ingredients such as vitamins, antioxidants, and essential oils. The application is simple: gently massage the oil directly to the cuticle region and allow it to absorb. This process not only improves the appearance of the natural nail but also provides essential nutrients to maintain strength and flexibility.
Moisturiser is equally important for overall hand care. Regularly using a good-quality hand cream or lotion will prevent the skin from becoming dry, irritated, or cracked. When choosing a moisturiser, consider selecting one with hydrating ingredients, such as glycerin, shea butter, or natural oils, which effectively combat the detrimental effects of acetone.
Following this regimen will help maintain the health and appearance of your natural nails and skin after SNS nail removal. Remember to regularly apply cuticle oil and moisturiser to continue enjoying the benefits of radiant, strong nails and supple skin.
Aftercare and Recovery
Once you have successfully removed your SNS nails at home, taking care of your natural nails and promoting their regrowth is crucial. This section will discuss promoting natural nail regrowth after SNS removal and recommend products to strengthen and protect nails.
Promoting Natural Nail Regrowth
Immediately after the SNS removal, your nails may feel weak and sensitive. To promote natural nail regrowth and improve the condition of your nails, follow these steps:
- Trim your nails: Keep your nails short and firm to prevent breakage during recovery.
- Moisturise your nails and cuticles: Apply a nourishing cuticle oil or a hand cream designed explicitly for nail care daily to maintain nail health and prevent dryness.
- Take a break from nail enhancements: Give your natural nails a break from any further chemical treatments, such as acrylics or gel polishes, to allow them time to recover and regain strength.
Products to Strengthen and Protect Nails
Using products specifically designed to strengthen and protect nails during the recovery phase is essential. Consider using the following types of products to support your nail health:
- Nail serums: These products contain essential nutrients that promote natural nail regrowth. Look for a serum containing vitamins and antioxidants that support healthy nails.
- Nail strengtheners: Nail strengthener formulas create a protective layer on the nail, helping to resist damage and improve nail structure. Frequent application can prevent nails from becoming brittle and encourage stronger nails.
Taking care of your natural nails after removing SNS nails at home is crucial to recovery. Following these aftercare steps and using suitable products can help improve your overall nail health and promote natural regrowth. Remember to be patient, as nails can take time to recover and regain strength.
When to Seek Professional Help
Although it is possible to remove SNS nails at home, there are instances where seeking the help of a professional nail technician is the best course of action. This section will discuss signs that it is time to visit a salon for a salon manicure removal.
Signs You Should Visit a Nail Salon
- Difficulty in removing the SNS nails at home: If you have made several attempts to remove them and are experiencing difficulty or pain, it is a clear indication that a visit to the nail salon is necessary. The nail technician will have the appropriate tools and knowledge to remove the nails safely and efficiently.
- Damage to your natural nails: If you notice excessive damage to your natural nails after trying to remove the SNS nails at home, such as splitting, peeling, or excessive thinning, it is advisable to seek professional help. A nail technician can assess the damage and recommend the best course of action to restore and maintain the health of your nails.
- Infection or irritation: If you notice any signs of infection or inflammation around your nails or cuticles, such as redness, swelling, or pus, you must visit a nail salon immediately. A qualified nail technician can determine the severity of the issue and recommend appropriate treatment.
- Inability to properly follow removal instructions: If you need help to follow the steps in a reliable removal process or need more tools and materials, visiting a nail technician is the better option. They have access to professional-grade products and expertise to remove the SNS manicure safely.
While at-home removal of SNS nails is possible, it is essential to recognise when you should seek professional assistance. Visiting a nail salon ensures the safe and proper removal of your SNS manicure while preserving the health of your natural nails. Remember to be attentive to signs of damage, infection, or difficulty removing the nails. Do not hesitate to consult with a qualified nail technician when necessary.
SNS Removal Myths Debunked
Common Misconceptions About Home Removal
Super glue: Some people believe that super glue can effectively remove SNS nails without causing damage. However, this is not true. Super glue can damage your natural nails and should not be used for SNS nail removal. Instead, use acetone for a safe and effective method.
Nail Strengthening Myths: A common misconception is that home remedies can instantly restore nail strength after SNS removal. While home treatments can provide some benefits, they are no substitute for scientifically formulated nail strengtheners. It's important to understand that nail recovery is gradual, and professional treatments are often more effective for long-term nail health.
Effectiveness of DIY Moisturisers: Many believe any household oil or moisturiser can suffice for post-SNS nail care. However, these generic products may not offer the comprehensive care that specialised nail and cuticle oils do. While they can provide essential hydration, specialised products are formulated with specific nutrients and hydration levels tailored for nail health, making them more suitable for optimal post-removal care.
Misconceptions About Aggressive Filing: It's a myth that removing SNS nails requires excessively aggressive filing. Gentle and precise filing is essential, as overly aggressive filing can harm the natural nail. The goal is to reduce the thickness of the SNS nails without damaging the underlying natural nail, aligning with the controlled and moderate filing approach outlined earlier in the blog.
Fake nails: Removing SNS nails is not the same as removing fake nails or press-on nail tips. Artificial nails can usually be removed with various non-acetone methods, like using a gentle adhesive remover or simply soaking them in warm water. SNS nails require acetone to break down the nail polish safely and effectively.
Nail health: Maintaining nail health during SNS removal is crucial. Improper removal methods can damage the natural nail and lead to long-term issues. To maintain nail health while removing SNS nails, following proper procedures, like soaking your nails in acetone and not aggressively scraping off the nail polish, is essential. Using a proper removal technique and moisturising your nails afterwards is vital to preserving your nail's overall health during the removal process.
Environmental Considerations of Nail Care
Nail care, including removing SNS nails, can hurt the environment if not done responsibly. This section will briefly discuss ways to minimise the environmental footprint of your home nail care routine.
Disposing of SNS Remnants Responsibly
When removing SNS nails at home, one of the steps involves buffing off the top layer of the nails using a nail file. These SNS remnants can pose an environmental risk if not correctly disposed of.
Proper Disposal Methods:
- Avoid rinsing the remnants down the sink or drain, which can lead to water pollution.
- Collect the remnants in a small container, such as a sealable bag or jar, to prevent them from scattering and harming wildlife.
- Dispose of the container in a waste bin designated for solid waste. Check your local waste management guidelines for specific disposal instructions.
In addition to responsible disposal, consider using environmentally friendly products in other aspects of your nail care routine. While 100% acetone is necessary for removing SNS nails, you can choose acetone-free removers for different nail polish types, as they are less harsh and release fewer harmful fumes into the atmosphere.
Moreover, consider purchasing nail care tools that are made of sustainable materials. For instance, choose a glass nail file instead of a disposable option, which can last years and significantly reduce waste.
By following these guidelines and focusing on environmentally friendly nail care, you can enjoy beautiful nails while minimising the environmental impact of your beauty routine.
Enhancing Nail Health Beyond Products
After removing SNS nails, it's not just the products you use that matter; your daily habits and environmental interactions play a crucial role in maintaining healthy nails. Lifestyle adjustments and routines that can significantly enhance the health and resilience of your nails post-SNS removal.
Lifestyle and Routine Adjustments for Optimal Nail Health Post-SNS Removal
- Mindful Nail Usage: Be conscious of how you use your nails daily. Avoid using your nails as tools to open cans or remove stickers, as this can cause unnecessary stress and potential damage.
- Hydration and Nutrition for Nail Health: Staying well-hydrated and maintaining a balanced diet rich in vitamins and minerals are critical to nail health. Ensure you drink plenty of water and consume foods high in biotin, omega-3 fatty acids, and protein to support nail strength and growth.
- Stress Management for Nail Wellness: High-stress levels can adversely affect your nail health. Regular stress-reducing activities like yoga, meditation, or light exercise can promote overall well-being, reflecting on the health of your nails.
- Protecting Nails from Harsh Environments: When exposed to harsh chemicals, cold weather, or excessive water, protect your nails with gloves. This simple practice can prevent brittleness and dehydration.
- Regular Nail Inspections: Regularly check your nails for any signs of damage, discolouration, or infection. Early detection of potential issues can lead to more effective treatments and prevent long-term damage.
By incorporating these lifestyle and routine adjustments, you can significantly enhance the health and resilience of your nails following SNS removal. These practices focus on holistic care, addressing not just the physical aspects of nail health but also the environmental and lifestyle factors that contribute to strong, healthy nails.
Parting Thoughts
Taking care of your nails is essential, and you may want to remove your SNS nails at home instead of visiting a salon. To make the process as smooth and damage-free as possible, remember to follow the steps properly and use the right products.
Start by buffing the top layer of your nails to remove the glossy gel coat. This process will help expose the underlying SNS powder layers for easier removal. Be gentle while buffing, as you don't want to damage your natural nails.
Once you've buffed the top layer, it is time to soak your nails in a solution. You can choose between using acetone or more natural alternatives like vinegar. While soaking, ensure your nails are covered well to soften and break down the SNS nail material effectively.
After adequately soaking your nails, gently remove the SNS powder with a wooden cuticle stick, working around the edges of your nails. Take your time and be patient to avoid any damage to your real nails.
Finally, indulge in some self-care by nourishing your hands and nails with moisturisers and oils. This step will help your nails stay healthy and recover from the removal process. Treat this as an opportunity to give your nails a break from regular salon visits and provide them with the care they deserve.
By following these simple steps, you will be able to remove your SNS nails effectively and safely at home. Remember, practice makes perfect; the more you follow this do-it-yourself process, the more comfortable and confident you'll be in achieving salon-like results in the comfort of your own home.
Mastered the art of at-home SNS nail removal? Maintain and enhance the health and beauty of your nails with our exclusive range of aftercare products. Diamond Nail Supplies is your go-to for nail care, from nourishing cuticle oils to strengthening treatments. Keep your nails looking salon-perfect every day!